Cleaning your pen? Do you need to? What happens if you don’t?
Many of us simply put more ink into our pens when we run out, but that’s bad practice and you know it! First, not all inks are created equal and there can be a reaction when you mix two seemingly innocent types. Second, the ink that dries on your nib, your ink reservoir, and in all the pieces between can create microscopic layers that grow like the paint on your walls until there’s no room for fresh ink to run! Third, if you love your pen, you should maintain it and flushing it out is like an “oil change” that keeps it in top condition for a log time.
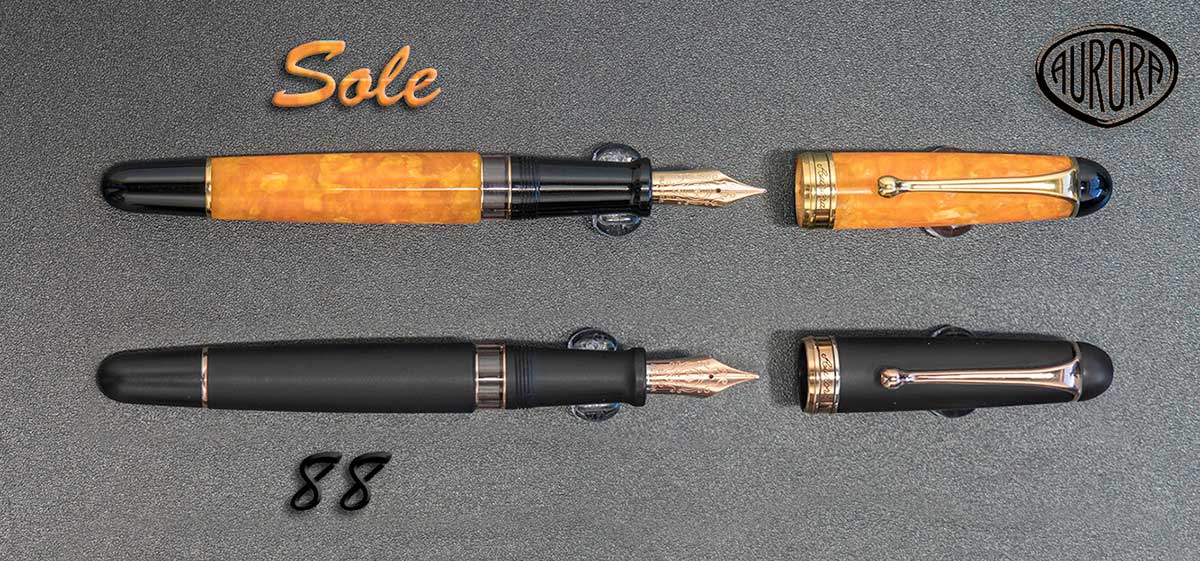
For today’s Newsletter, we are featuring the Aurora 88 Black Satin & Limited Edition Sole
Flushing Your Fountain Pen: What You Need
with the Aurora 88 Black Satin & Ltd. Sole
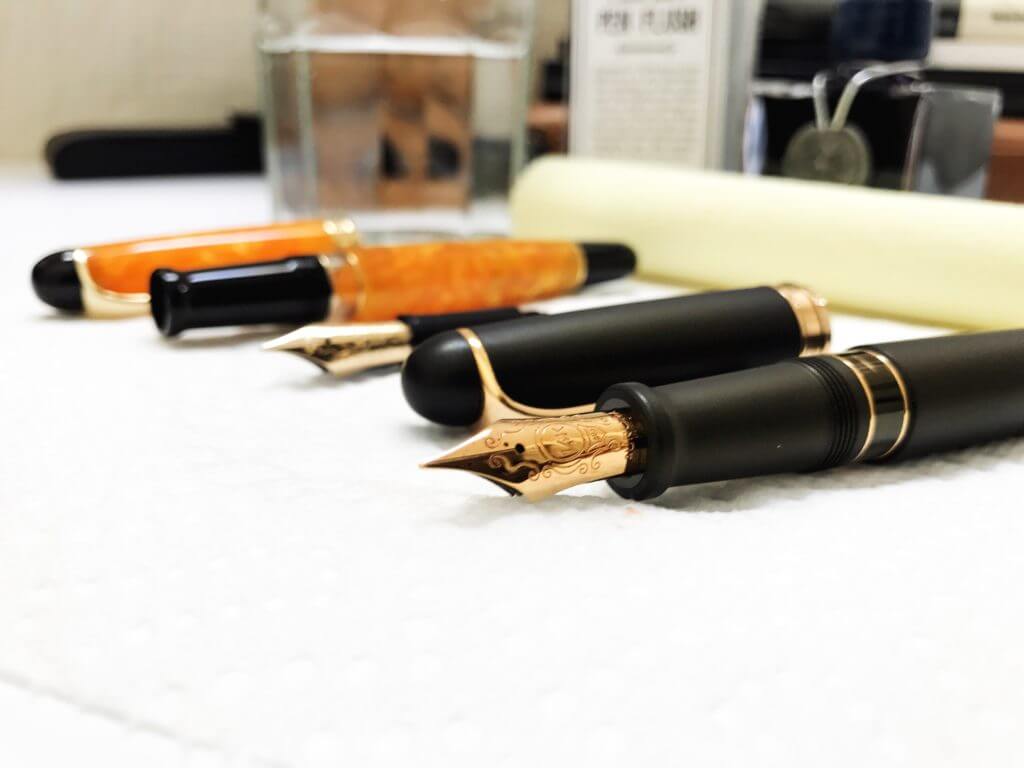
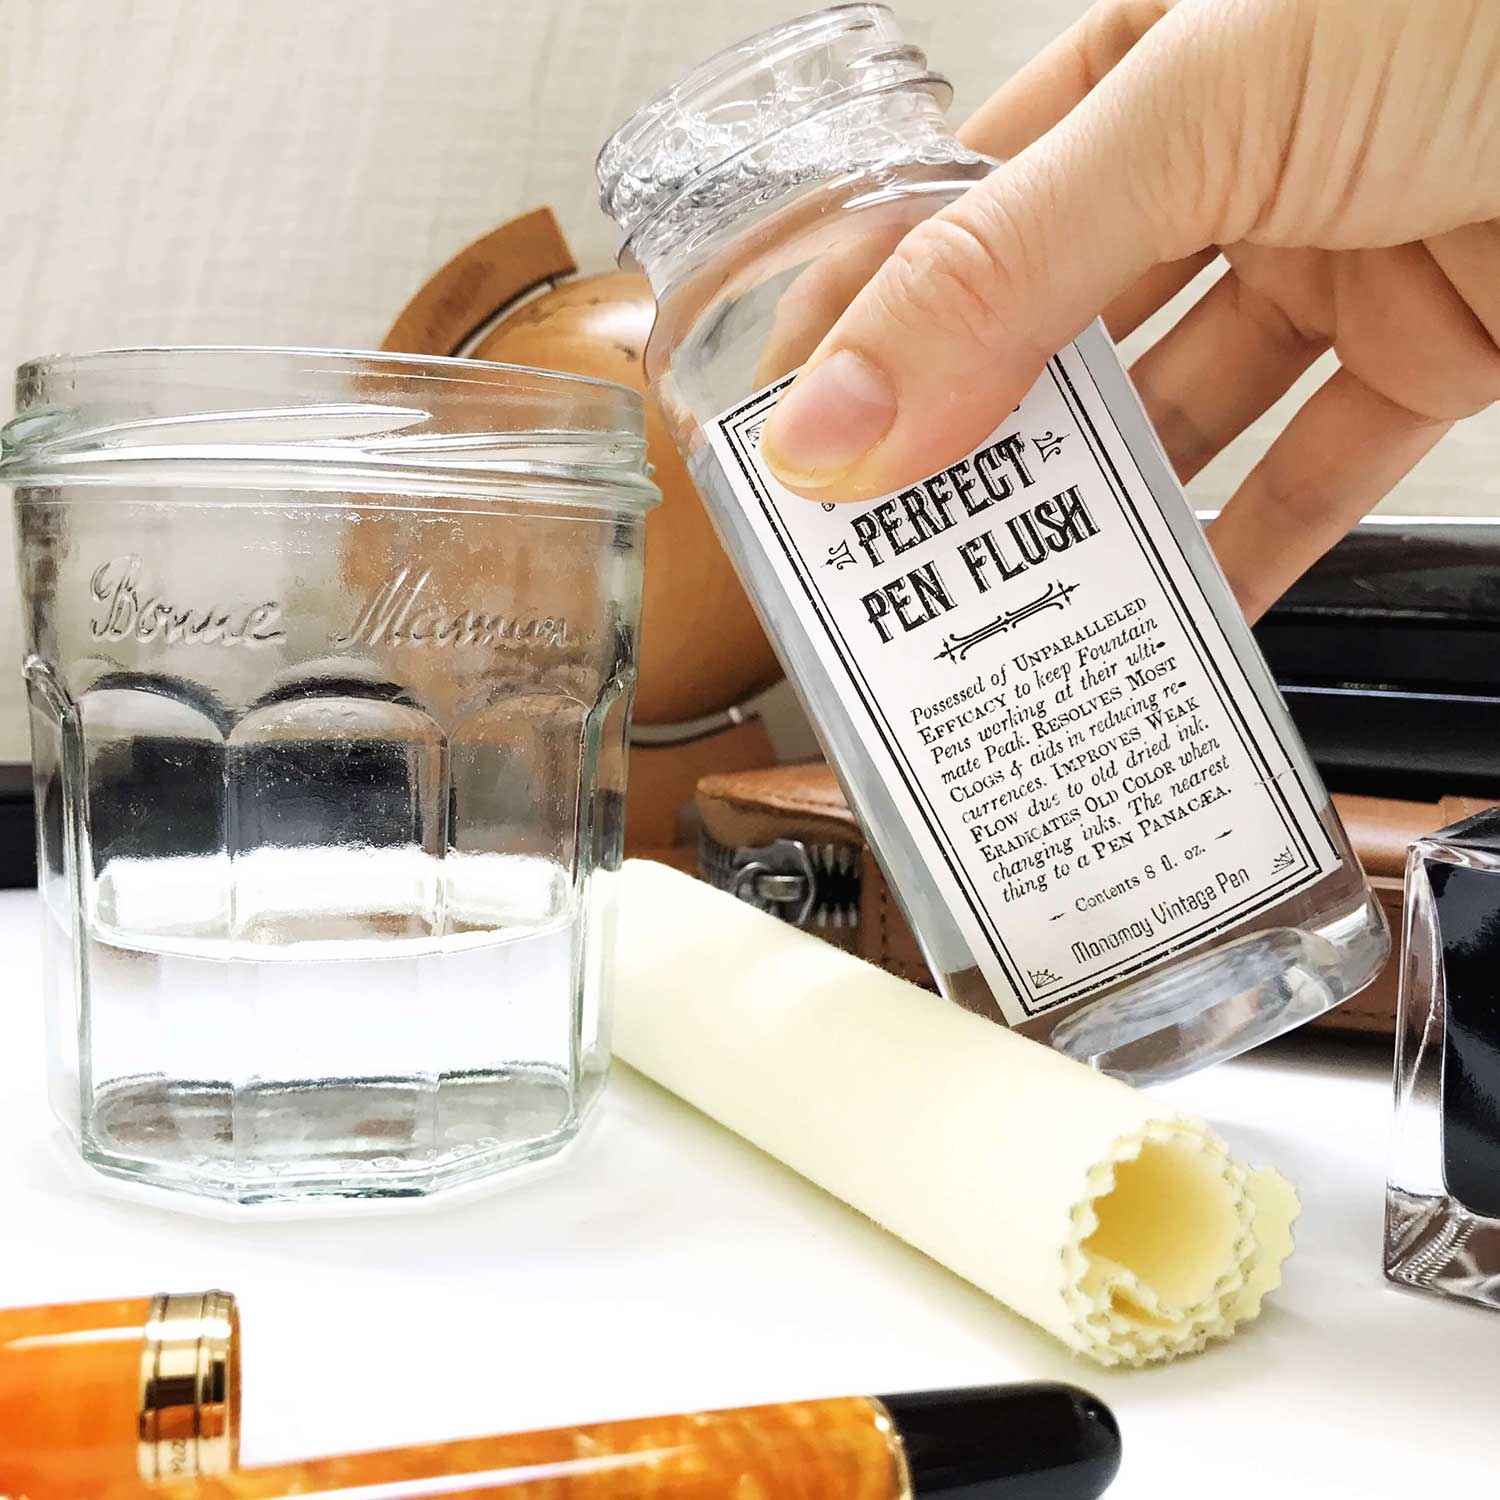
Why did we choose the 88 and Sole? They both have an amazing feature that allows for the nib to unscrew from the body! This means you can visually inspect all of the pieces during your cleaning process. While the J.B.’s Perfect Pen Flush works just as well with all pens, visual inspection will give you a better idea of how much to use when cleaning all your pens. And here’s everything you see in the photos:
Ok, here we go!
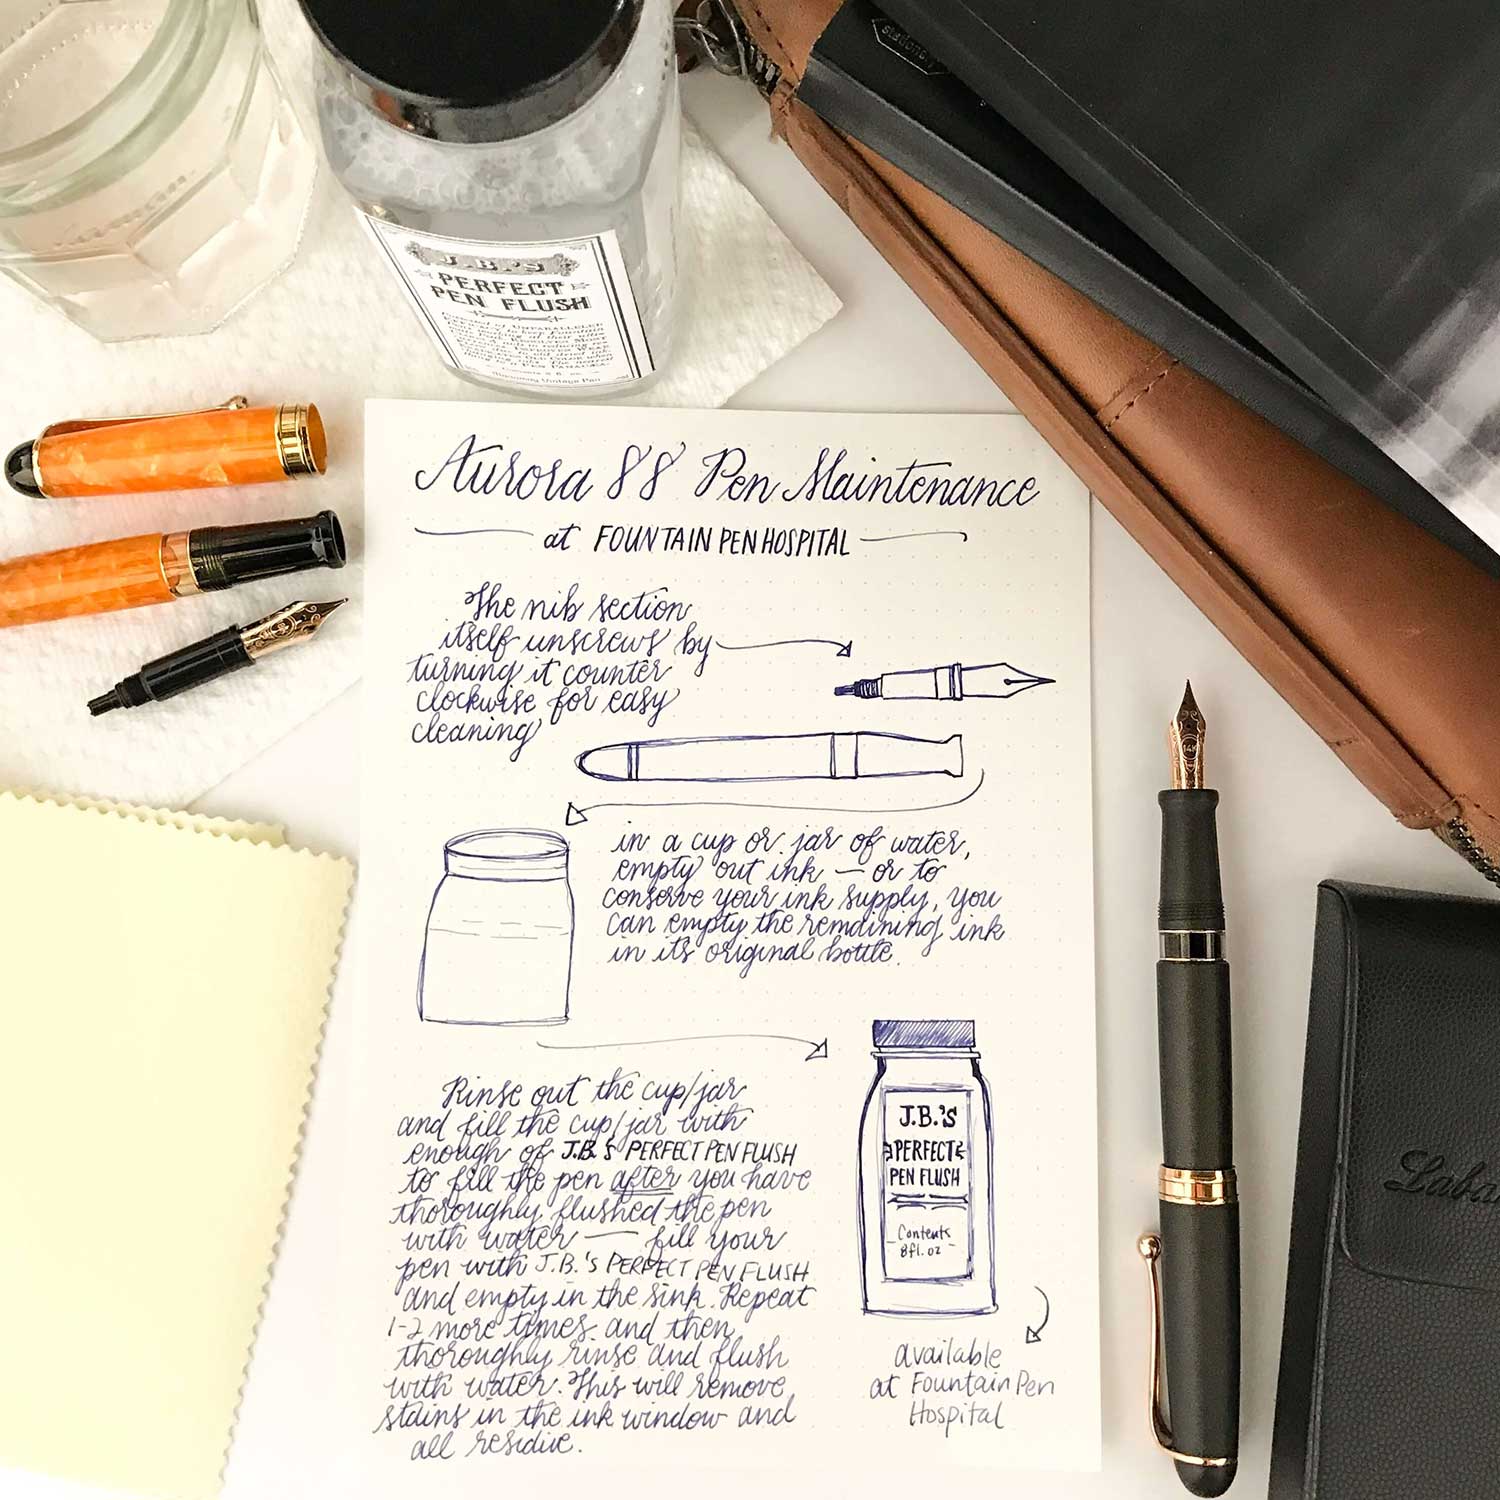
Step 1. Unscrew Your Nib and Empty Your Ink
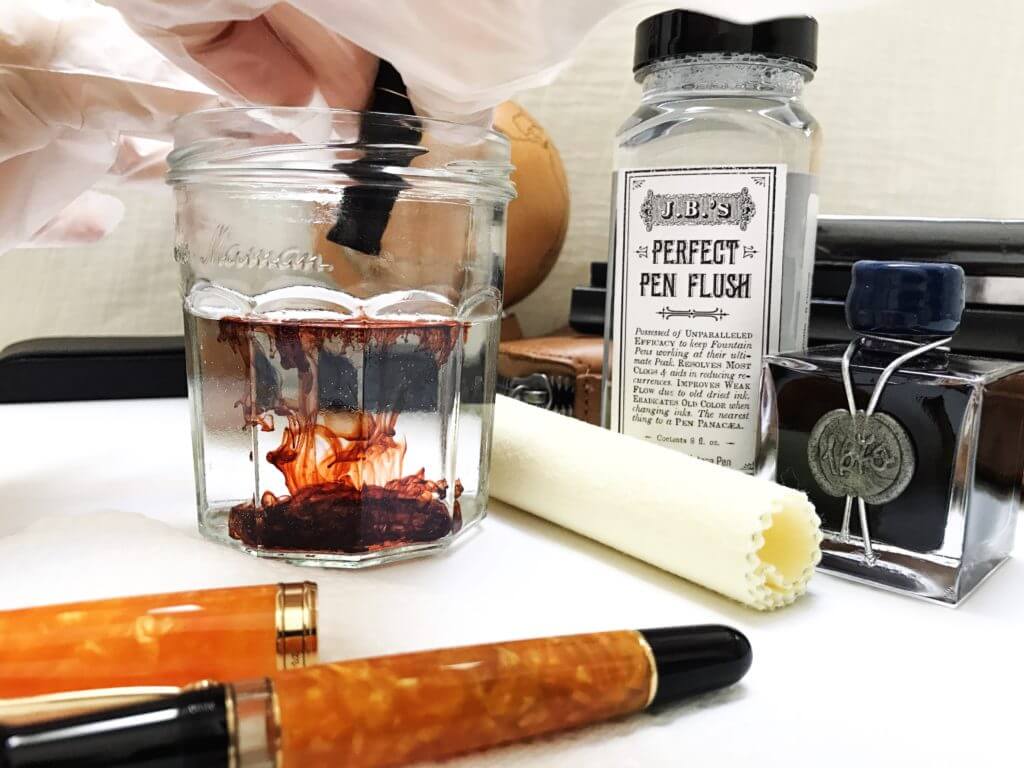
Twist in a counter-clockwise direction to remove the nib. Be careful and hold the pen upright so that the ink in the chamber doesn’t drip out like it did on my new pants. Now you can empty the ink into the sink, or if you’d like to conserve the ink, you can use a syringe to transfer anything that’s left into a backup jar. Please note that it is not recommended to put old ink into a new ink jar as it can be contaminated by dirt, cause a bad chemical reaction, and in very rare cases even result in mold.
Step 2. FLUSH THE PEN!
Here’s the magic; J.B.’s Perfect Pen Flush is best used with troublesome grime when the writer has not been diligent with their regular cleanings. We included the instructions from the back of P.B.’s in the image, however, we recommend being extra diligent and doing the following. For best results, flush your pen with WATER a few times before using J.B.’s Perfect Pen Flush. Leave the Flush in the pen after the first fill for a few hours or even overnight, depending on the level of the ink residue inside. After this, use water in the pen again and carefully inspect the color to determine if more Flush is needed.
Step 3. Polish Your Pen!
Now, take a close look at all the metal parts of your pen and get your polishing cloth out. Using a medium amount of pressure, rub the metal parts with the cloth to get rid of any oxidization or dirt. It may even be possible to buff out any very light scratches, but be warned that it may take a while. If you want to do this, we recommend putting on a good movie and taking your time. Your pen will look good as new in no time!
Step 4: Add Your New Ink!
Whether you do it by syringe, piston converter, ink sac pump, or have your own creative new technique, your pen is as good as new!
Why is J.B.’s Perfect Pen Flush Cleaning Solution important?
This magic liquid dissolves any residue on the inside of your pen. Many inks aren’t just mixes of colored liquid, but actually a fine dust sized material that is suspended in liquid. When you write, the liquid is absorbed into the paper and eventually evaporates, leaving the beautiful colored lines that stay where you draw them. However, this can happen to your pen as the ink dries and layer upon layer of ink precipitate builds up.